How do I set up the SuperOffice Inbox in SuperOffice 8.5 and earlier?
Updated on 6 Oct 2023
How do I set up the SuperOffice Inbox in SuperOffice 8.5 and earlier?
| Please follow this FAQ, if you use SuperOffice Online, SuperOffice Onsite 8.5 R11 or newer version. |
To start using SuperOffice Inbox for reading, sending and archiving emails directly from SuperOffice CRM, please follow the steps below:
Step 1. Confirm that your e-mail account have met prerequisites
Step 2. Set up SuperOffice as preferred email client
Step 3. Configure SuperOffice Inbox with your email server details
Step 1. Confirm that your e-mail account have met prerequisites
SuperOffice Inbox supports most of the IMAP email servers. Before configuring your email account make sure IMAP is enabled.
Step 2. Set up SuperOffice as preferred email client
Normally the first time you login to SuperOffice, the Web Tools installation pop up wizard appears where you can you select which email client you prefer to use. Read this FAQ to learn: How can I download and install Web Tools for SuperOffice 8.x? If the first time you closed the Web Tools wizard without selecting the correct email client you can repeat the process by following steps bellow:
- Click on
 in the top menu and from the drop-down menu choose Local settings.

- In the Settings dialog, in the E-mail client field (1) choose SuperOffice CRM and click OK (2) to save the setting.

Step 3. Configure SuperOffice Inbox with your email server details
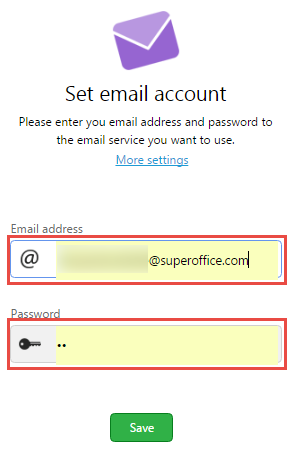
- Click on the Inbox icon in the navigator menu. The Log in screen appears the first time you open your inbox.

- Enter your email and password of the email account you want to use.

- If you use SuperOffice version 8.1 or newer SuperOffice will try automatically fill in your email server details after you enter your email and password. If it won't be able to guess these details correctly or the email address and password you entered are not correct you will be redirected to More settings dialog. There you'll need manually enter or check configuration information for Incoming and outgoing servers.
- If you use SuperOffice version 8.0 or older you will need manually fill in information for incoming and outgoing servers. See example below:
To get your emails imported to SuperOffice fill in:

- E-mail server: your IMAP server details*
- User name: your user name, which is most of the time your full e-mail address
- Password: your e-mail account password
- SSL: depends on your e-mail provider's settings
To be able send out emails from SuperOffice fill in:

- Outgoing server name: your SMTP server details*
- User name: your user name, which is most of the time your full e-mail address
- Password: your e-mail account password
- SSL: depends on your e-mail provider's settings
*If you need to specify the port for your mail server, do this by writing a colon ":" after the email server name, followed by the port number. E.g.: 'my.mail.server:80'
Note! SuperOffice Online automatically import e-mails, which were created in the last 60 days. This limit can be changed, by sending a request to SuperOffice support.
Change email account in SuperOffice Inbox
If you want to change your email configuration follow these steps:
- Click on
 and choose E-mail options.

- Select E-mail account tab and press Edit/remove button.

More information:
Video: How to set up the SuperOffice Inbox in SuperOffice CRM 8
Check the FAQs below, which explains how to configure SuperOffice Inbox with the most commonly used email providers
FAQ: How to configure folder names in SuperOffice CRM Inbox?
In this article
Did you find this information useful?